User Tools

Site Tools


software:maud

MAUD: Materials Analysis Using Diffraction

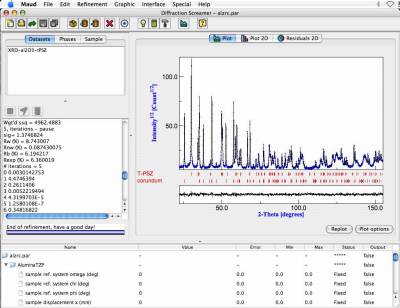
Maud is an a Rietveld extended program to perform the combined analysis. It can be used to fit diffraction, fluorescence and reflectivity data using X-ray, neutron, TOF or electrons.

List of MAUD features, as copied from the MAUD homepage

  • Written in Java can run on Windows, MacOSX, Linux, Unix (needs Java VM 1.7 or later)
  • Easy to use, every action is controlled by a GUI
  • Works with X-ray, synchrotron, Neutron, TOF and electrons
  • Developed for Rietveld analysis, simultaneous multi spectra and different instruments/techniques supported
  • Ab-initio structure solution integration, from peak finding, indexing to solving
  • Different optimization algorithms available (Least Squares, Evolutionary, Simulated Annealing, Metadynamics, Simplex, Lamarckian…)
  • Le Bail fitting
  • Quantitative phase analysis wizard
  • Microstructure analysis (size-strain, anisotropy, planar defects, turbostratic disorder and distributions included)
  • Texture and residual stress analysis using part or full spectra
  • MEEM and superflip algorithm for Electron Density Maps and fitting
  • Thin film and multilayer aware; film thickness and absorption models
  • Reflectivity fitting by different models, from Parratt (Matrix) to Discrete Born Approximation
  • Fluorescence full pattern fitting based on crystal structure models (XRF and GIXRF full quantification)
  • Works with TEM diffraction images and electron scattering
  • Several datafile input formats
  • Works with images from 2D detectors (image plates, CCDs, flat or curved), integration and calibration included
  • CIF compliance for input/output; import structures from databases
  • Many other features…look at the Maud in action page.

How to import diffraction images into Maud

Maud uses .esg file format. To convert your .tif diffraction image, you can either use Fit2D or (in case you are not familiar with Fit2D) a plugin in Maud.

Fit2D

Maud plugin

  1. Convert your diffraction image to .tif format (if it isn't already). The TIMEleSS tools may be helpful for this.
  2. Open Maud.
  3. Click on DataFileSet_X, then the eye, then the Datafiles tab, then From images. A new window called Area image should open.
  4. Click File and Open. Choose the diffraction image you want to refine (the one you converted to .tif earlier). A black window should appear (sometimes you can see some faint spots but usually it's pitch black).
  5. Open the properties window by clicking on Image and Properties. Change the unit to mm and the pixel dimensions to the right size (for example 0.2 mm for P02.2 and 0.079 mm for ID27, respectively). Press Ok.
  6. Click Plugins, then Maud Plugins and then Multi-Spectra from normal transmission/reflection image. A new parameter window opens.
  7. Type in your sample-detector distance and beam center (Center X and Center Y) from your calibration. Put the Tracker circle radius to a 2θ value which is still completely visible on your diffraction images (usually 20° is fine). Put the Final angle to 360° and the Number of spectra to 72. Leave the other values default.
  8. Click Update. This should move a red circle in your black screen to the center. If it has moved but not to the center you might have a type in the values entered above.
  9. Click Ok. A save window should open. Save the image. Make sure it gets the ending .esg.
  10. Close the Area image window. Don't save changes.
software/maud.txt · Last modified: 2019/05/09 10:28 by matthias