User Tools

Site Tools


processing:start

This is an old revision of the document!


Multigrain data processing workflow

Here is an outline of a data processing workflow. This assumes that you already have your data collected. Depending on your objectives, follow the matching track.

Workflow for getting grains and their orientations (outline)

The goal of this workflow is to get a list of grains and their specific orientations. If you want to check your workflow you can start with a simulation (see here. This outline is for dealing with real diffraction data consisting of a series of 2D diffraction images which was acquired during a 3D scan. More info on the experimental setup can be found here.

  1. Perform a calibration to obtain the exact sample-detector distance and the exact beam center. This calibration is crucial since all further processing depends on it. You can use Dioptas or fit2D and Maud, for example.
  2. If necessary, convert your series of images to EDF format (click here for further information on that).
  3. Have a closer look at your images (with Fabian or Dioptas, for example). Throw out all bad images and replace them with empty or average images.
  4. Create median and average images.
  5. Refine the average image with any refinement software (for example, Maud) to obtain the exact cell parameters of your sample material.
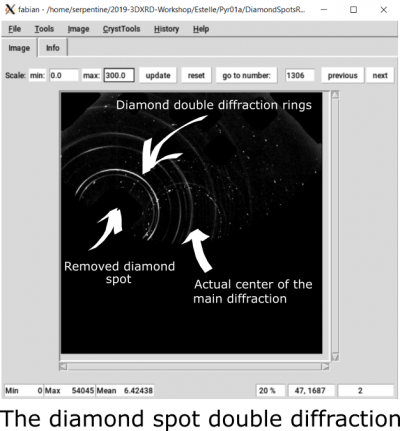
  6. Remove diamond spots (and shadow).
  7. Perform a PeakSearch.
  8. In ImageD11 the found peaks are fitted to the parameters of the sample and experiment, followed by the calculation of the g-vectors.
  9. With the calculated g-vectors the grains will now be indexed, using GrainSpotter.

Workflow for getting grains and their orientations (full)

Calibration of the standard

Conversion of the file series to EDF

Most of the used software can work only with EDF images. Unfortunately, most of the beamlines don't provide their data in this format but in MarCCD (.mccd) or Tiff (.tif). To convert them, you can use one of the TIMEleSS tools.

Remove bad images

The removal and exchange of bad images is not a process which is done once and then finished. During the processing it may happen several times that you have to throw out an image which you considered all right in a previous step.
What is a bad image and why do they have to be removed?
A bad image is one where you have artefacts which cannot be removed by any software. Frequent examples are :

While the simulation is running you can already look at the images, which are already created. For this, open a new tab in the Konsole and open Fabian:

fabian.py

This is convenient because you can already see at this point if your simulation works. And in case it does not, you can stop the simulation process right now and you don't need to wait until all images are created, which can take very long time. While you're at it, check also the O-matrix. You find it in Fabian under Image –> Orientation. Choose the one which is the same as in your input file.

Experimental parameters

From these peaks you can now fit the experimental parameters. To do this, open ImageD11 by typing the following to the Konsole:

ImageD11_gui.py

To load the PeakSearch file click on Transformation –> Load filtered peaks and choose the .flt file from the separate folder with the processed data. Although the image is loaded, it is not plotted automatically, because there are two different ways of plotting. One plotting option is the 2D diffraction image which is similar to Fabian (y/z plot). The other possibility is a cake plot (tth/eta plot). Both options can be accessed by clicking on Transformation. Note that plotting both options at once is not making sense because the software is using the same scale for both images (which makes it look weird). To switch from one plot to the other just click on the Clear button (bottom of the window) and then plot the other one. Clear does only erase the plot, the data is still there.

Before you check the plots you should enter the measurement parameters. Go to Transformation –> Edit parameters and enter all parameters for your sample. Some of them can be found in the calbration files of the beamline (such as the poni file). Remove all check marks from the vary boxes and press Ok.

Next you can have a look at the tth/eta plot. Most of the peaks should appear to be on imaginary vertical lines. Zoom in and check, if these lines are completely vertical. If not, you might have strain in your sample. If the line looks like a sinus curve of exactly one period this is due to a wrong beam center. To fix this, go back to Edit parameters and activate the check marks for the y-position and z-position of the detector. Press Ok and click on Fit for several times until the spots don't move anymore. The imaginary lines should now be completely straight (if you don't have strain). If they are not, you can try to fit other parameters.

At some point you can click on Transformation –> Add unit cell peaks. Red tick marks will appear which indicate the expected positions of the vertical lines. With this you can check whether your input parameters (cell parameters, detector distance, …) were correct.

processing/start.1559920737.txt.gz · Last modified: 2019/06/07 15:18 by matthias