Table of Contents
Clean up diamond anvil cell data
Typical diamond anvil cell data for multigrain XRD has to be pre-processed and cleaned.
Elements that should be addressed are:
- shadows from the tungsten carbide diamond seats,
- single-crystal diffraction spots from the diamond anvils,
- additional diffraction from very small grains (powder rings), pressure media, etc.
Shadows
Diamond anvil cells have a limited opening and create shadows due to the seat supporting the diamonds.
We we started multigrain crystallography experiments, we though this was going to be a problem and created a script called timelessDACShadow to do so.
As a matter of fact, this is not very useful as there simply nothing in these regions. You can probably leave the shadows as they are.
Diamond spots removal
General idea
Processing of the single-crystal diffraction spots from the diamond anvils is performed using the timelessDiamondSpotRemoval script, which is part of the TIMEleSS tools.
The idea is that diamond diffraction is
- very intense (often saturate the detector),
- extends over many pixels (in X and Y) and in ω.
The timelessDiamondSpotRemoval script does the following
- reduce the resolution of the image, to make it blur and get rid of the small features,
- apply a median filter on the reduced image to clear out small diffraction spots, which are probably originating from the sample,
- detect diamond diffraction spots based on a threshold in intensity,
- create a mask based on the detected diamond diffraction spots,
- expand the mask in X, Y, and ω to account for the fact that the real diamond diffraction spots are wider and appear over wider omega ranges than detected by the above steps.
timelessDiamondSpotRemoval requires a median image. Median will be removed in this script. Once
In addition, you can define a disk, at the center of the image, in which nothing should be removed. This option is for samples with very intense diffraction spots on the inner rings which could be confused with diamond spots based on intensity criteria.
Step by step instructions
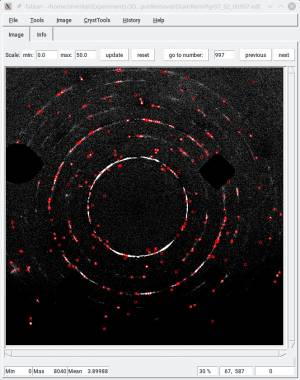
In the first round, you should test the spot detection. This is performed by running timelessDiamondSpotRemoval [options] spots. You should play on the scale, filtersize, and threshold parameters. As you run the script, it will show you the original image, and the location where it detected diamond spots. Play with the above parameters until you are satisfied with the diamond spot detection, and only diamond spots. You do not want this script to detect sample spots.
In a second round , you use timelessDiamondSpotRemoval [options] plotMask. It will run the diamond spot detection (use the parameters you found in the previous steps), create a mask, and plot it in overlay to the diffraction images. Grow your mask with growXY and growXYO. You can also force the script to ignore a disk-shape region in the center of the image with the c_rawy, c_rawz, and radius parameters.
Third step: timelessDiamondSpotRemoval [options] clearMask. Use the same option as above. It will show you the result of your mask.
Final step: timelessDiamondSpotRemoval [options] save, to save the clean images in new files.
Detailed example
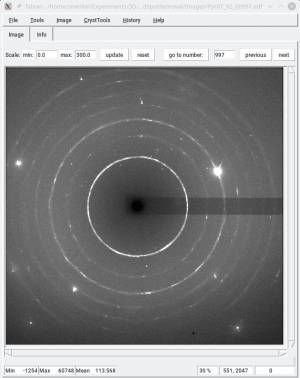
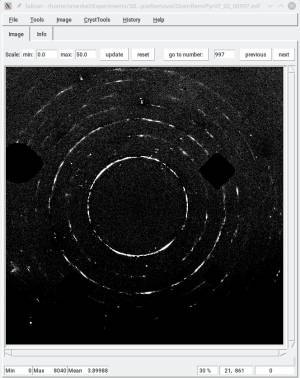
In the above example, the timelessDiamondSpotRemoval script is used to
- remove the median
- erase the image region with diamond spots.
The exact command with ran was
timelessDiamondSpotRemoval -P Images/ -n imagestem_ -f 0990 -l 1000 -d 5 -m image_median.edf --newpath=DiamRem/ --filtersize=11 --growXY=10 --growXYO=10 -t 0.75 save
The parameters were chosen as follow
Images/was the path to the images to process,- We processed images
imagestem_00990.edftoimagestem_01000.edf, - The file with the median image was
image_median.edf - We saved the new images in
DiamRem/ filtersize=11was a good setting to detect diamond spots, and only those. A smaller value was catching sample peaks as well,growXY=10: grow the mask by 10 pixels in both x and y,growXYO: grow the mask by 10 pixels in omega, but also x and y (in addition to the previous growth),- a threshold of 0.75 (relative units) worked well.
Note that the number of pixels used to grow the mask may be different from the final size of the mask. The final mask will be larger than your settings (there is a scaling applied somewhere).
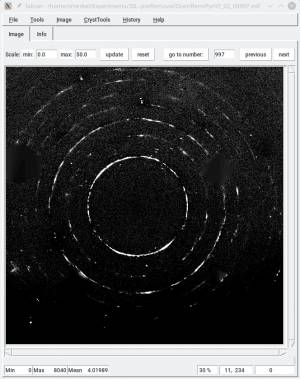
As a test, the image below shows the sample peaks we extracted from the final image. This would not have been possible on the raw diffraction image.
Inpainting
By default, the timelessDiamondSpotRemoval script replaces the masked region with the median intensity of the image. Sometimes, this can lead to problems.
In such case, you can use inpainting which will try to fill the gap as well as possible. This is done by adding –inpaint True to the command line arguments.
The script will be significantly slower, but gaps will be filled with values matching the mask's surroundings. As a matter of fact, we have had little use of this option but, at least, it is available.


